These Simple Cinnamon Baked Pears are the perfect after dinner treat. The naturally sweet fruit is tender and perfectly spiced. The cinnamon, butter, sugar, and natural juices combine to make a delicious syrup that makes every sweet bite oh so satisfying.

Baked pears make a regular appearance at our house. I usually throw them in the oven right alongside whatever I’m cooking for dinner. They only take a few minutes to prepare and bake for 40 minutes. When they come out of the oven, they are ready to serve with a nice scoop of vanilla ice cream.
As simple and easy as this dessert is to make, it can also be served on a more formal occasion. I’ve served these Baked Pears to guests many times. They are just right when a light, sweet dessert is the perfect compliment to a rich meal.
Make this recipe, because...
This dessert is so simple to make. It only takes about 10 minutes to assemble and is ready to eat right out of the oven.
The syrup that is made while the pears cook coats the fruit perfectly ensuring that each and every bite is well spiced and beautifully sweet.
This recipe is inexpensive and not over the top with sugar, making it a family friendly treat. With a dab of butter and a little bit of sugar, my kids gobble up a whole pear after dinner. That is win in this house!
If you are in the mood to bake, try this Classic Apple Pie or Homemade German Chocolate Cake.
Ingredients

Instructions
Step 1
- Preheat your oven to 350°.
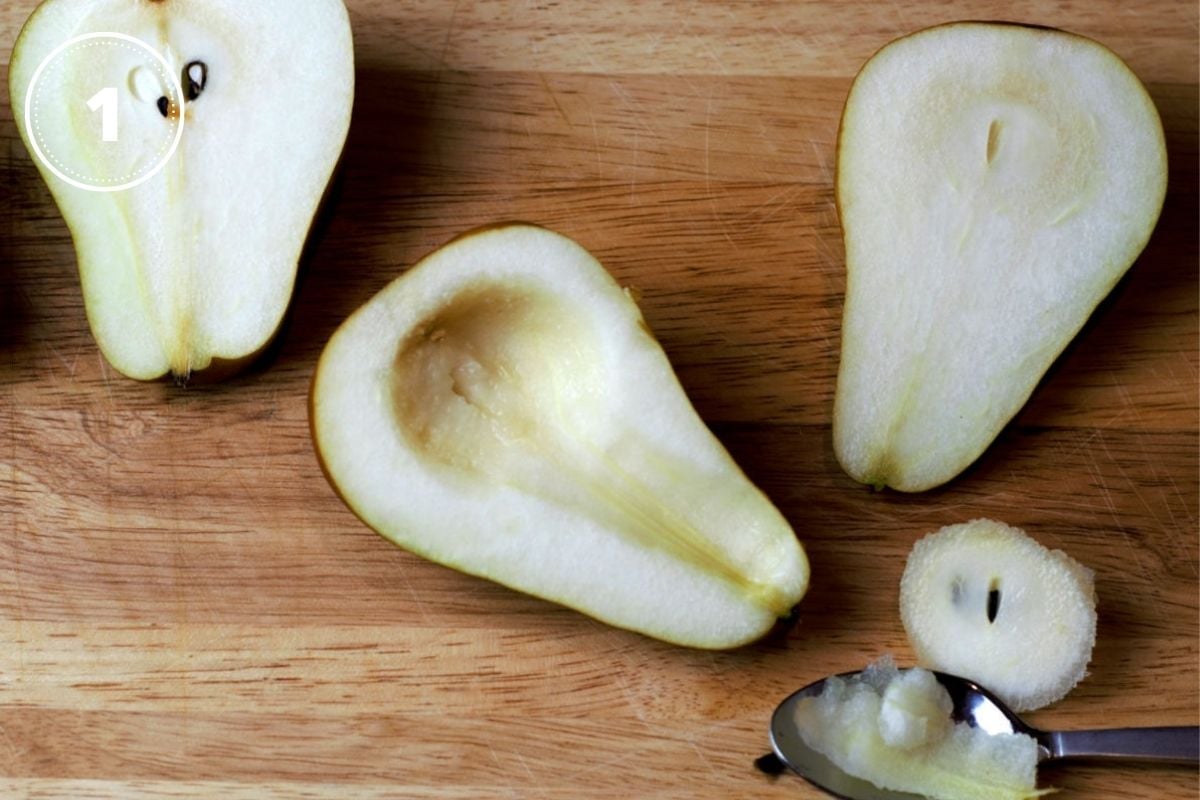
- Wash fruit and cut in half. Then use a spoon to take out the core.

Step 2
- Lay pear halves in a baking dish with the skin side down.
- Divide butter into equal portions and place a portion on top of each half.
- Mix together cinnamon and sugar and sprinkle over the top of the fruit.

Step 3
- Next add a cup of water to the bottom of the baking dish.
- Then cover with foil and bake for 30 minutes.
- Cook for 10 more minutes with the cover off

FAQs
The best baking pears are Bosc, D’Anjou, and Bartlette pears are good for baking. Bosc are strongly preferred. Bosc pears sweeten sooner in the ripening process.
Pears should be firm-ripe for baking. They should hold their shape while cooking. Overly ripe or soft-ripe pears may fall apart while cooking.
The flesh of a ripe pear will give just a little bit to the pressure of your thumb.
Expert Tips
When coring, be sure to remove the circular area that holds the seeds at the base of the fruit as well as the vein that runs to the top. You should be able to core a ripe pear with a teaspoon.
Choose fruit that is firm and unblemished.
Serve warm with Vanilla Ice Cream and a drizzle of the syrup from the bottom of the baking dish.

Once you have the dessert, you just need some great Appetizers. Serve Loaded Zucchini Fritters, Salmon Cakes, and Mediterranean Chicken Skewers for heart pre-dessert snacks.
Did you make this recipe? Follow me on Instagram, post a picture and tag @deliciousbydesigntv. Leave this recipe a 5 Star Review
📖 Recipe

Simple Cinnamon Baked Pears
Equipment
- 13"x9" Baking Dish
- Foil
Ingredients
- 4 Pears Bosc, Bartlette, D'Anjou
- 2 Tablespoons Sugar
- 1 Teaspoon Cinnamon
- 2 Tablespoon Butter
- 1 Cup Water
Instructions
- Preheat your oven to 350°.
- Wash fruit and cut into halves. Then use a spoon to take out the core.
- Lay pear halves in a baking dish with the skin side down.
- Divide butter into equal portions and place a portion on top of each half.
- Mix together cinnamon and sugar. Then sprinkle over the top of the pears.
- Next add a cup of water to the bottom of the baking dish.
- Then cover with foil and bake for 30 minutes.
- Cook for 10 more minutes with the cover off
Notes
- When coring pears be sure to remove the circular area that holds the seeds at the base of the pear as well as the vein that runs to the top. You should be able to core a ripe pear with a teaspoon.
- Choose fruit that is firm and unblemished.
- Serve warm with Vanilla Ice Cream and a drizzle of the syrup from the bottom of the baking dish.
Nutrition
Never miss a new recipe from Delicious by Design! Sign-up below for weekly recipes directly in your inbox.


Leave a Reply