
Tri Tip has long been one of my favorite cuts of beef because it delivers incredible flavor without the premium price tag of many steaks. While it's often associated with the grill, learning how to reverse sear tri tip in the oven is one of the easiest ways to achieve consistently tender, juicy results.
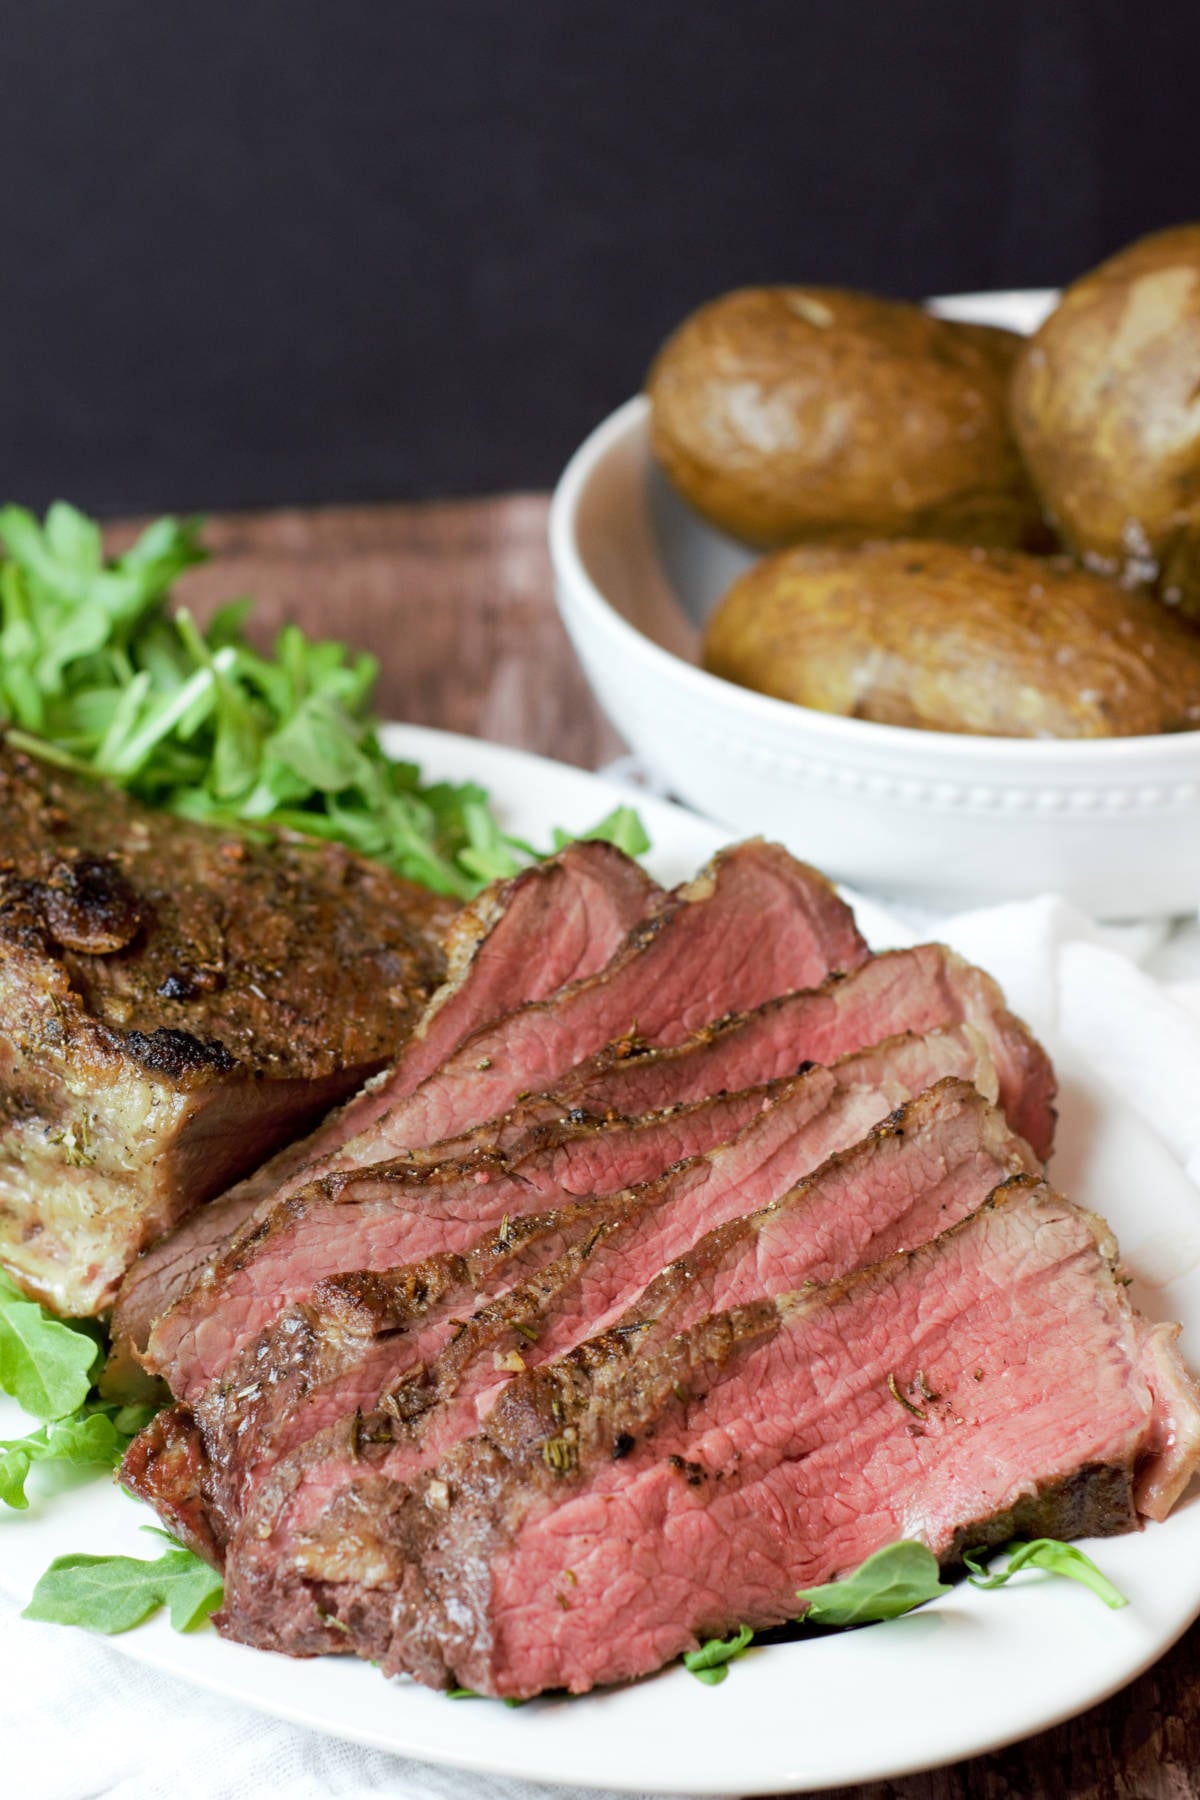
Because tri tip is a relatively lean roast, cooking it over high heat from start to finish often leaves the outside dry before the center reaches the perfect temperature. Reverse searing solves that problem by slowly roasting the meat first, allowing it to cook evenly while rendering the fat for exceptional flavor. A quick finish in a blazing hot skillet creates the rich, caramelized crust that makes every slice look and taste like it came from a steakhouse.
Whether you're cooking for a family dinner or entertaining guests, this reverse sear method delivers reliable, restaurant-quality results every time.
Why This Recipe Works
Reverse searing isn't just another way to cook steak-it's one of the most dependable methods for preparing thicker cuts of beef.
Cooking at a low temperature allows the roast to heat gradually from the outside in, producing an evenly cooked interior without overcooking the outside. During that time, the fat slowly renders, adding flavor and tenderness without forcing moisture from the meat.
The garlic herb compound butter serves two purposes. First, it seasons the entire roast with garlic, rosemary, salt, and pepper. Second, as the butter melts during roasting, the milk solids begin to brown, helping develop rich flavor and color before the meat ever reaches the skillet.
The final high-heat sear takes less than two minutes per side, creating the crisp, flavorful crust everyone loves while preserving the perfectly cooked interior.
Jump to:
Ingredients
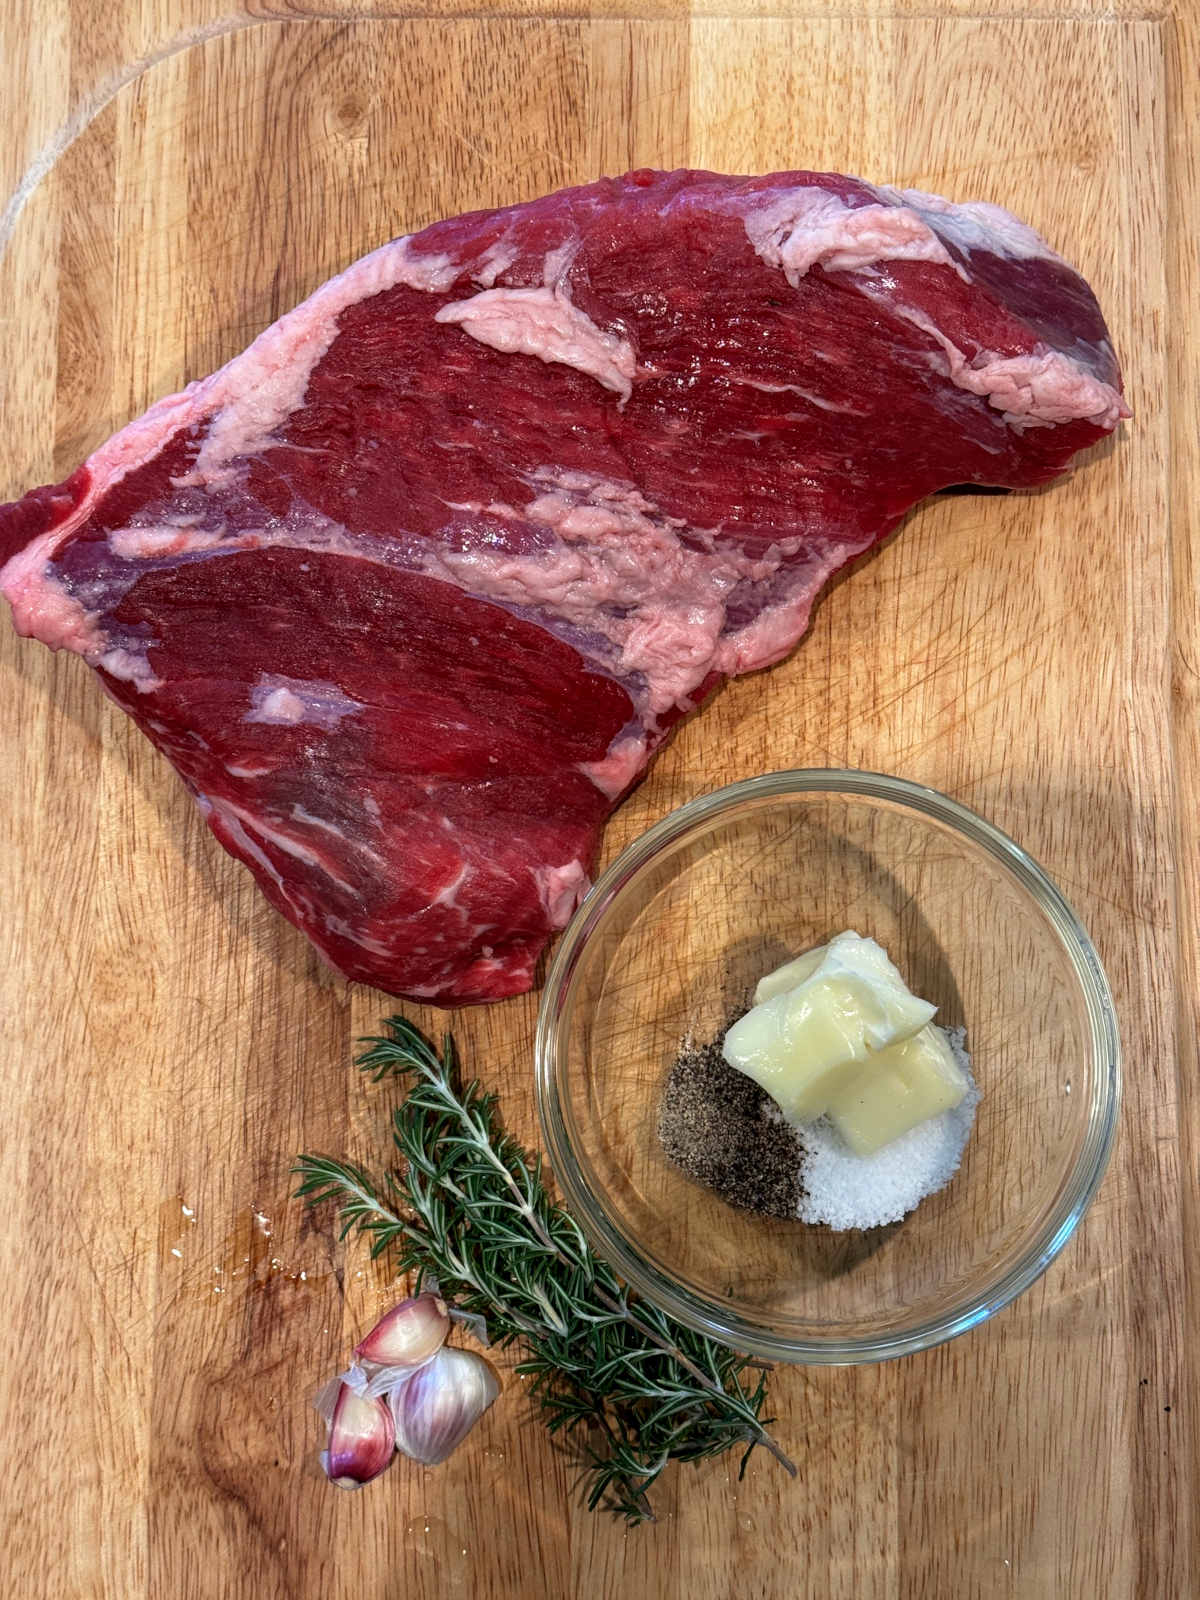
- Tri Tip - Choose a well-marbled tri tip weighing between 2½ and 3 pounds. While this cut is naturally leaner than a ribeye, good marbling will keep it juicy throughout the slow roasting process. Trim away any large pieces of hard surface fat while leaving the fat cap intact to help baste the meat as it cooks.
- Butter - Softened butter creates the base for the compound butter, helping the seasonings adhere evenly while adding richness to every bite.
- Garlic - Fresh garlic slowly roasts into the butter, creating a mellow, savory flavor that complements the beef without overpowering it.
- Fresh Rosemary - Rosemary has long been one of my favorite herbs to pair with beef. Its woodsy aroma stands up beautifully to rich meat, and mixing it into the butter allows those flavors to gently infuse the roast throughout cooking.
- Kosher Salt & Coarse Black Pepper - Simple seasonings are all this roast needs. Kosher salt enhances the beef's natural flavor while coarse black pepper adds just enough bite to balance the richness.
- Avocado Oil - Because the skillet needs to be nearly smoking hot, choose a high smoke point oil like avocado oil for the final sear.
See recipe card for quantities.
How to Reverse Sear a Tri Tip
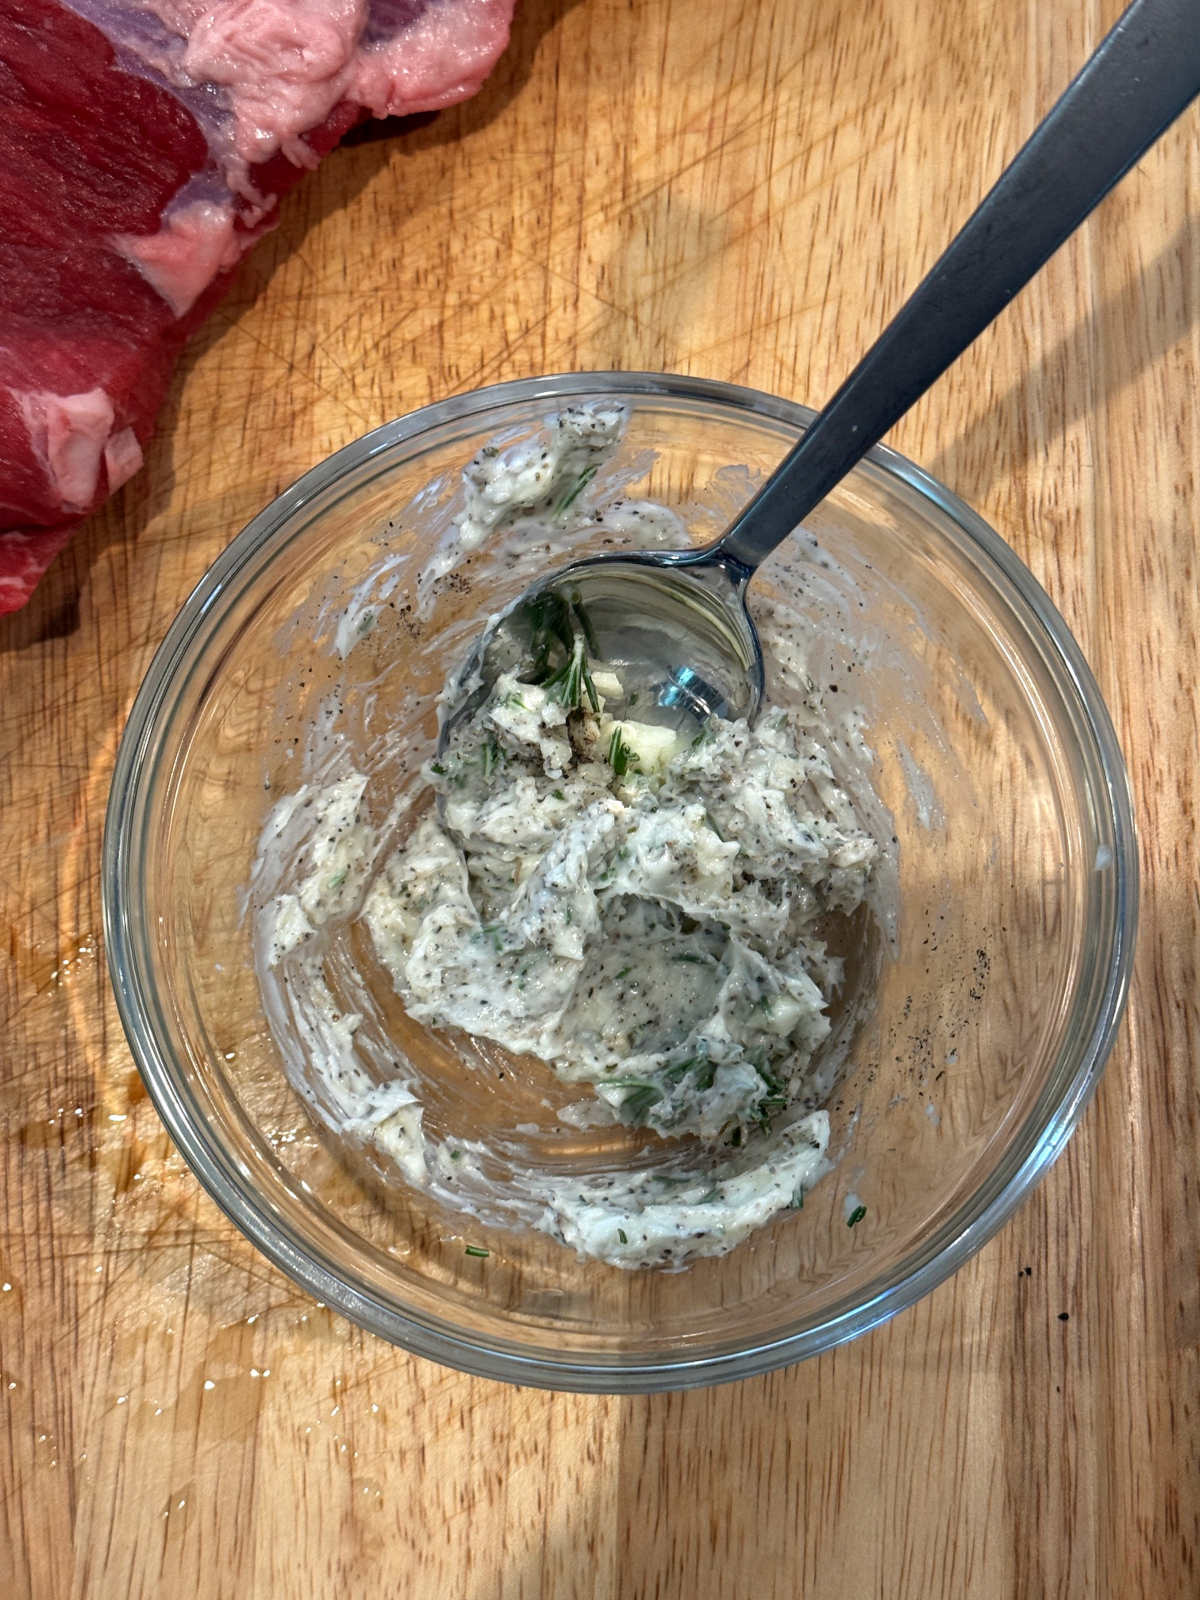
- Step 1: In a small bowl, combine softened butter, minced garlic, kosher salt, black pepper, and fresh rosemary until evenly mixed.
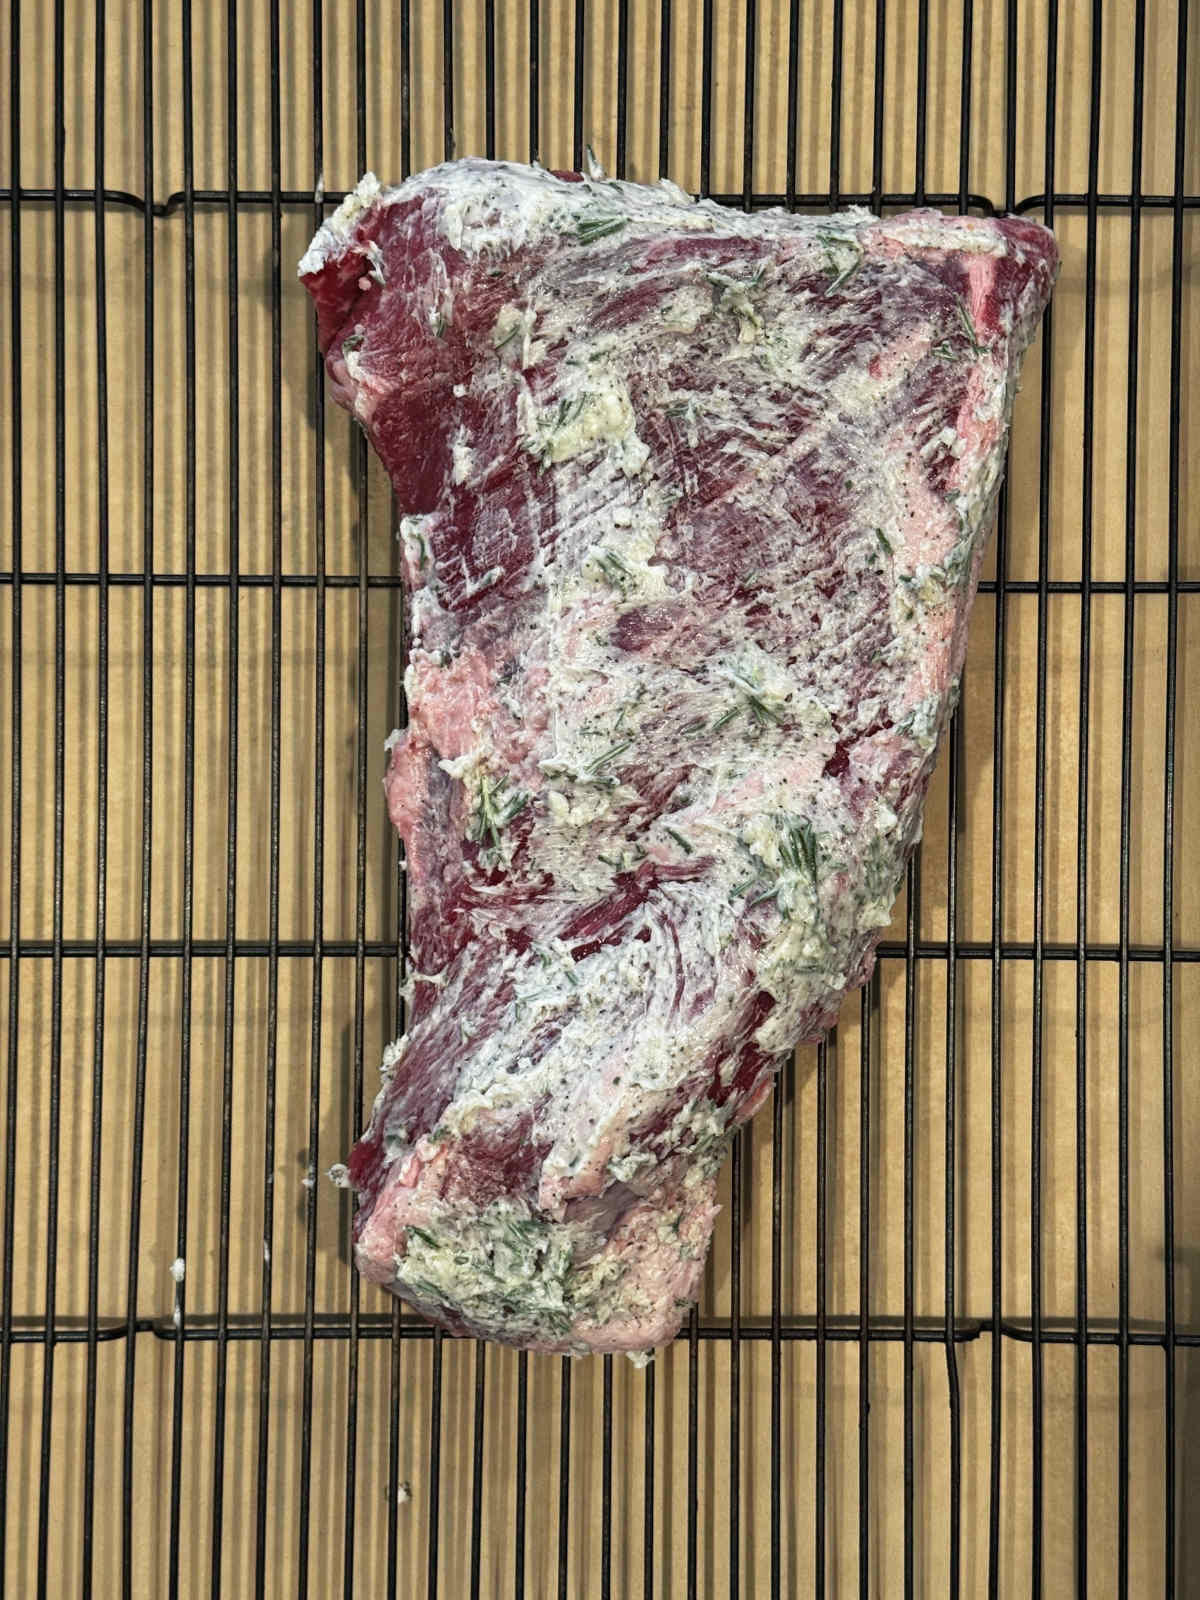
- Step 2: Pat the tri tip dry with paper towels and rub the compound butter evenly over the roast. Then, place the tri tip on a wire rack set over a sheet pan with the fat cap facing up.
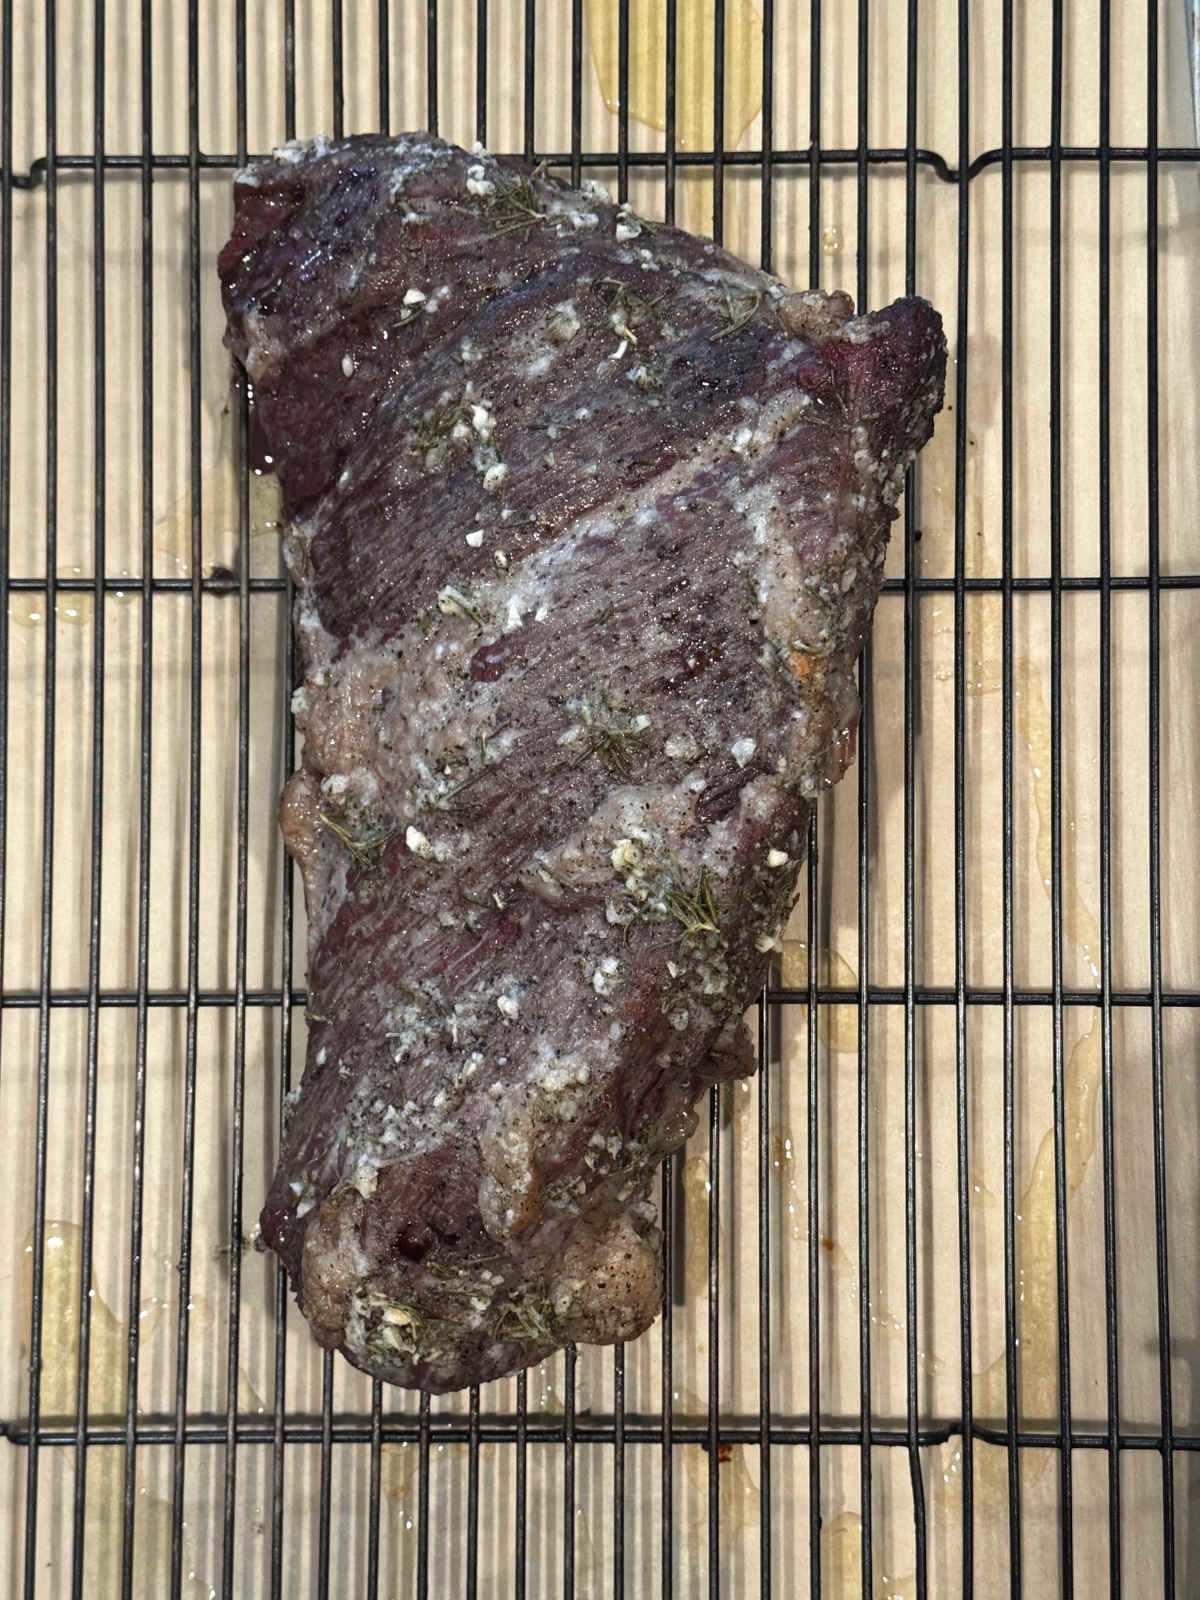
- Step 3: Roast until the thickest part of the meat reaches an internal temperature of 125°F using a reliable meat thermometer. Then, remove the tri tip from the oven and allow it to rest for 20 minutes.
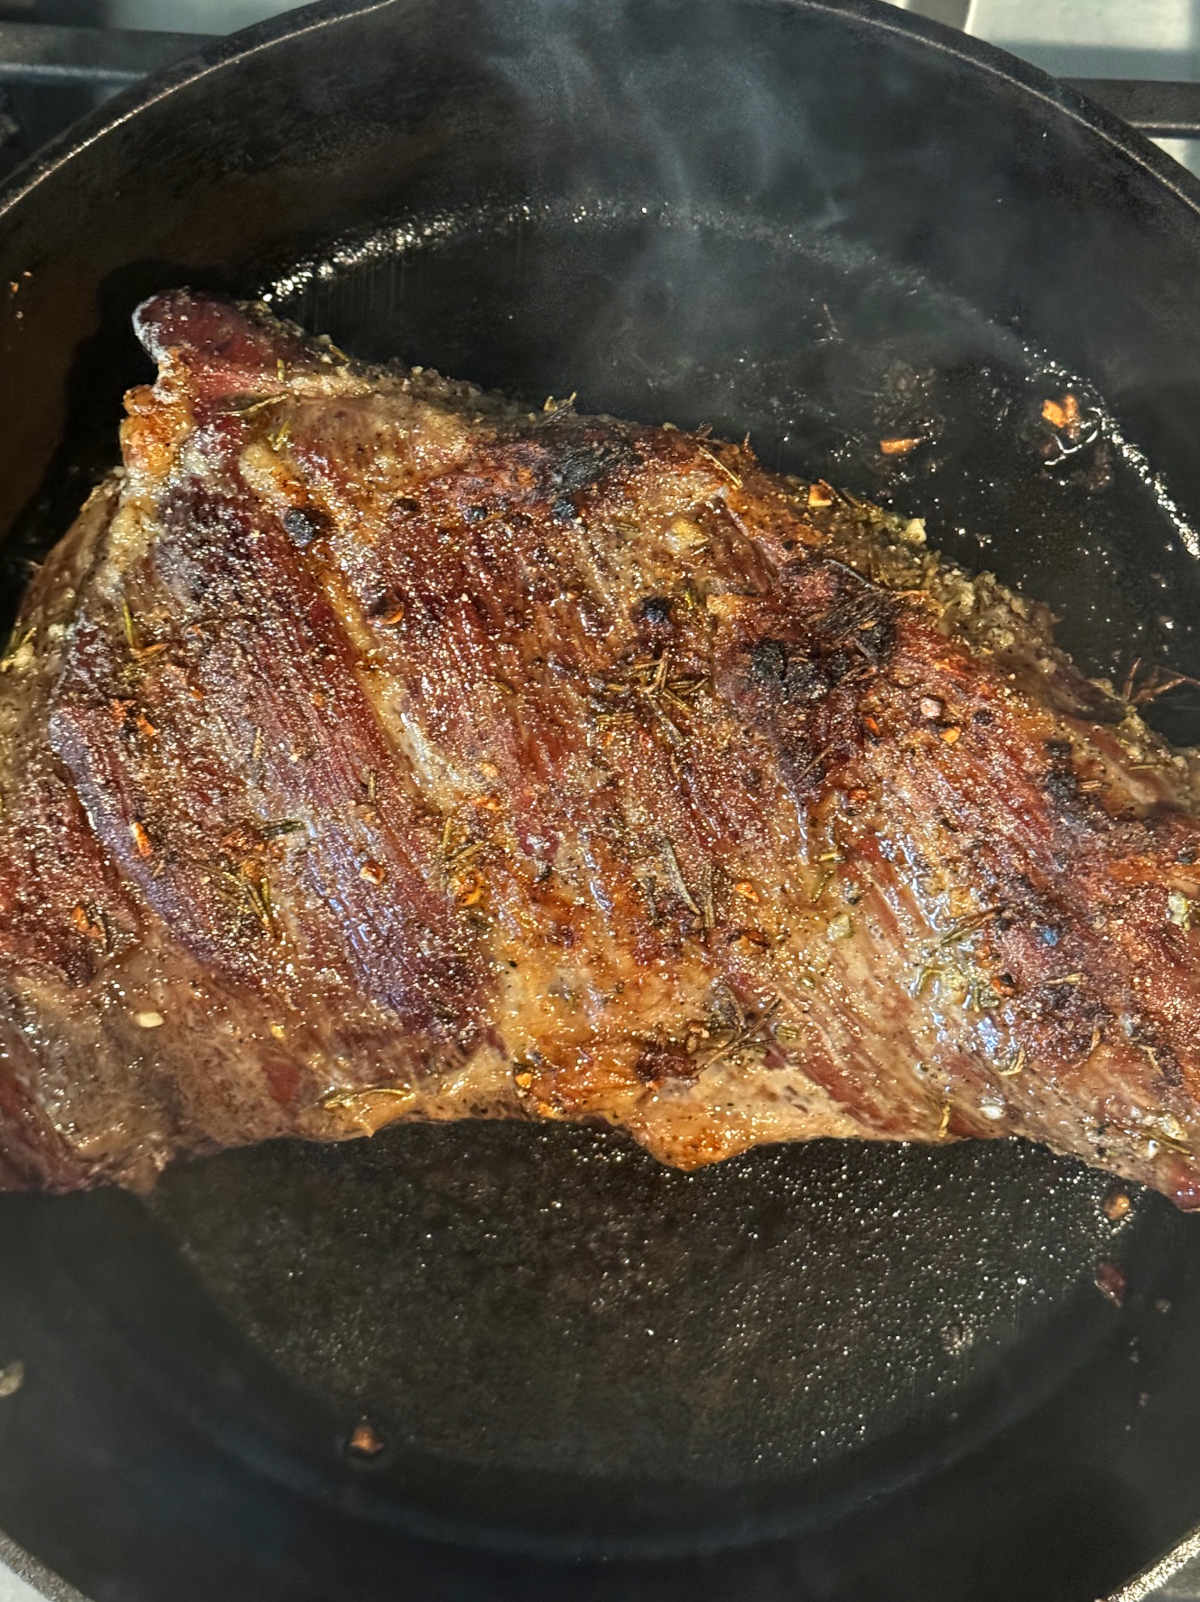
- Step 4: Add a thin layer of avocado oil to a hot skillet and carefully place the tri tip fat-side down into the skillet. Sear for about one minute, or just until a deep brown crust develops. Flip and repeat on the second side.
Hint: One of the biggest advantages of cooking at a low temperature is that the roast cooks evenly from the outside toward the center. You'll also notice the butter beginning to brown as it roasts, giving the exterior rich color long before the final sear.
Slice and Serve
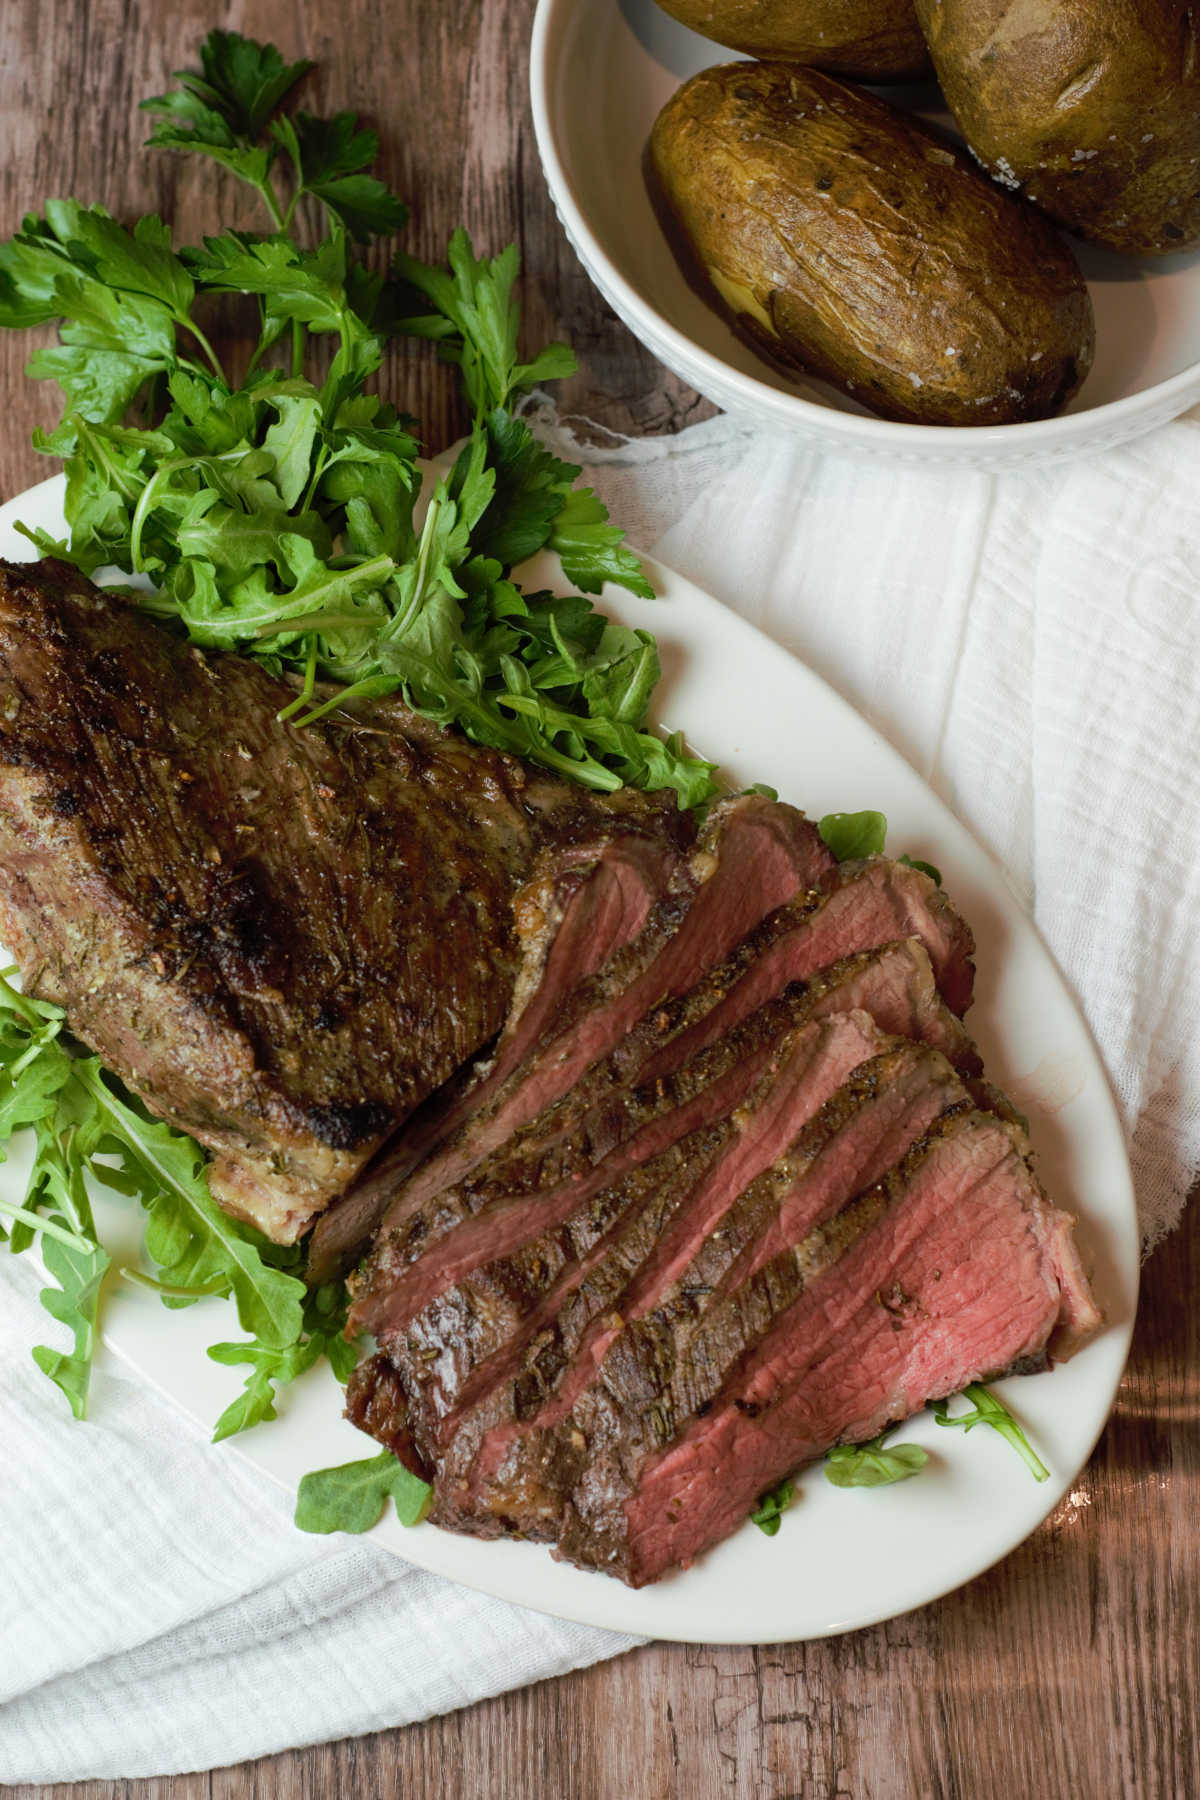
Transfer the tri tip to a cutting board and slice it into ¼-inch slices against the grain.
Tri tip is unique because the direction of the muscle fibers changes partway through the roast. Taking a moment to identify the grain before slicing makes every bite noticeably more tender.

For more detailed instructions read my page How to Cut Tri-Tip.
Diana's Tips for Success
Pat the tri tip dry with paper towels before rubbing the compound butter generously over the entire roast. Removing excess moisture helps the butter cling to the surface and promotes better browning later.
For the best flavor, allow the seasoned roast to rest at room temperature for about 30 minutes before cooking.
Begin checking the internal temperature about 20 minutes before the estimated finish time. Every roast is slightly different, so relying on a thermometer instead of the clock is the best way to avoid overcooking.
Top Tip
Always remove the tri tip from the oven about 5°F below your desired final doneness to account for carryover cooking. This is the additional cooking that occurs after the meat has been removed from the heat source.
Resting is every bit as important as the cooking itself. As the roast rests, carryover cooking will raise the internal temperature another five degrees while the juices redistribute throughout the meat. Cutting into it too soon allows those flavorful juices to escape instead of remaining where they belong.
If it takes more than two minutes to brown, your skillet isn't hot enough. The goal is to develop color quickly without continuing to cook the center of the roast.
How Long Does Reverse Sear Tri Tip Take?
Cooking time varies depending on the thickness of the roast rather than its exact weight, which is why an instant-read thermometer is far more reliable than the clock.
As a general guideline:
| Tri Tip Size | Approximate Cooking Time |
| Under 3 pounds | 1½ to 2 hours |
| Over 3 pounds | 2 to 2½ hours |
Begin checking the internal temperature about twenty minutes before the estimated finish time to avoid overcooking.
Internal Temperature Guide
For the most accurate results, remove the roast from the oven a few degrees before your desired final temperature.
| Doneness | Remove from Oven | Final Temperature After Rest |
| Rare | 120°F | 125°F |
| Medium Rare | 125°F | 130°F |
| Medium | 130°F | 135°F |
| Medium Well | 135°F | 140°F |
| Well Done | 145°F | 150°F |
Remember that the quick skillet sear adds very little additional cooking. Most of the temperature increase happens during the resting period.
How to Serve
Reverse seared tri tip is versatile enough for everything from a casual family dinner to a holiday meal. Pair it with roasted potatoes, grilled vegetables, a crisp salad, or your favorite steakhouse sides.
Can I Make Reverse Sear Tri Tip Ahead of Time
Tri tip is best served immediately after searing, but you can season it with the garlic herb butter up to 24 hours in advance. This gives the salt time to penetrate the meat while making dinner prep even easier the next day.
Tri tip is at its absolute best served fresh from the skillet while the crust is still crisp and the center is perfectly juicy.
However, the leftovers are delicious and can be used to make Leftover Steak Quesadillas and Tri Tip Sandwiches.
Storage and Reheating
Store leftover tri tip in an airtight container in the refrigerator for up to four days.
To reheat, warm slices gently in a skillet with a splash of beef broth or a small pat of butter over low heat. Gentle reheating helps preserve the tender texture without overcooking the meat..
Related Recipes
Looking for recipes to serve with this? Try these:
- Roasted Kale and Quinoa Salad
- Cabbage and Carrot Salad
- Charred Broccolini
- Grilled Mexican Street Corn
- Warm German Potato Salad
- Brown Butter Potatoes
Stay in the Know! Follow Delicious by Design on Facebook for new recipes and cooking tips! Love this recipe? Leave a 5 Star Review!
📖 Recipe

How to Reverse Sear Tri Tip
Equipment
- 1 Sheet Pan with Rack
- Large Skillet Cast Iron or Stainless Steel
Ingredients
- 4 Tablespoons Butter softened
- 3 Cloves Garlic minced
- 1 Tablespoon Kosher Salt
- 1 Teaspoon Coarse Black Pepper
- 1 Teaspoon Fresh Rosemary minced
- 2.5 - 3 Pounds Tri Tip trimmed
- 1 Tablespoon Avocado Oil for searing
Instructions
- In a small bowl, combine the softened butter, minced garlic, kosher salt, black pepper, and fresh rosemary until well mixed to create a garlic herb compound butter.
- Pat the trimmed tri tip dry with paper towels. Spread the compound butter evenly over all sides of the roast. Let it rest at room temperature for 30 minutes before cooking, or season it up to 1 day in advance and refrigerate until ready to use.
- Preheat the oven to 250°F. Place the tri tip on a wire rack set over a sheet pan and roast until the thickest part reaches an internal temperature of 125°F using an instant-read thermometer.
- Remove the tri tip from the oven and let it rest for 20 minutes. During this time, the internal temperature will continue to rise about 5 degrees. The slow roasting process allows the fat to render gradually, while resting gives the juices time to redistribute throughout the meat for a tender, juicy roast.
- Heat a large cast iron or stainless steel skillet over high heat until it is very hot and just beginning to smoke.
- Add a thin layer of avocado oil, or another high smoke point oil, to the skillet.
- Place the tri tip in the skillet fat cap side down and sear for about 1 minute, or until a deep brown crust forms. If it takes longer than 2 minutes to brown, the skillet is not hot enough and the meat may begin to overcook.
- Turn the tri tip over and sear the second side for about 1 minute, or until nicely browned.
- Transfer the tri tip to a cutting board and slice into ¼-inch thick slices, cutting against the grain for the most tender bite.
Notes
| Tri Tip Size | Approximate Cooking Time |
| Under 3 pounds | 1½ to 2 hours |
| Over 3 pounds | 2 to 2½ hours |
| Doneness | Remove from Oven | Final Temperature After Rest |
| Rare | 120°F | 125°F |
| Medium Rare | 125°F | 130°F |
| Medium | 130°F | 135°F |
| Medium Well | 135°F | 140°F |
| Well Done | 145°F | 150°F |
Nutrition
Never miss a new recipe from Delicious by Design! Sign-up below for weekly recipes directly in your inbox.



Diana Reis says
This is a great guide for tri tip and other large lean cuts of beef.